


#BBPT-663 – ‘55-’57 CHEVY BIG BLOCK – BB Pro Tour header for stock chassis with stock manual steering box
$2,250.00 – $4,500.00
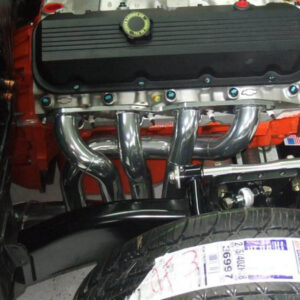
Header Specs
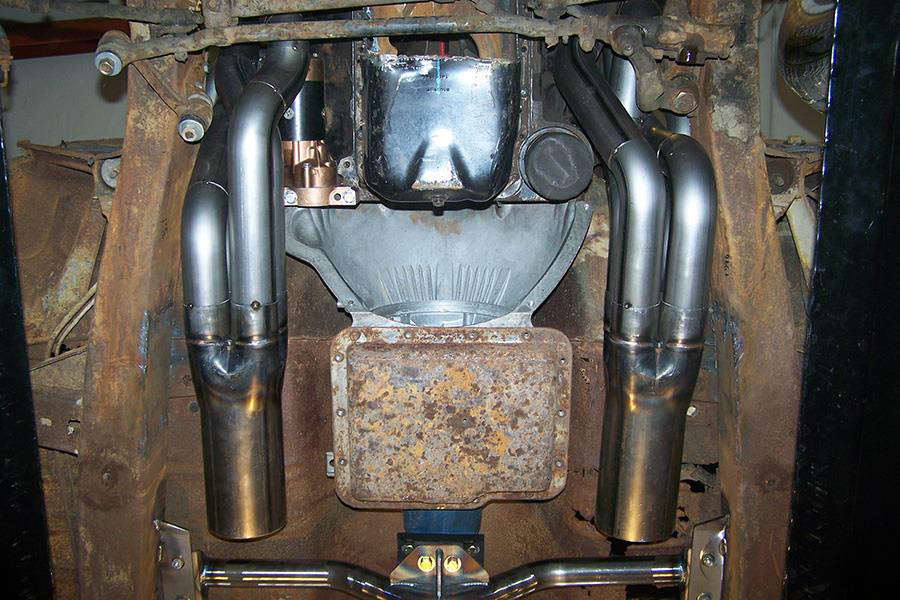
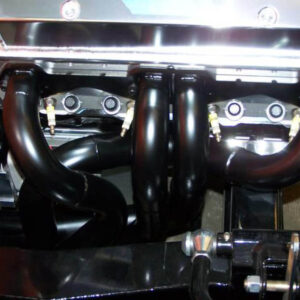
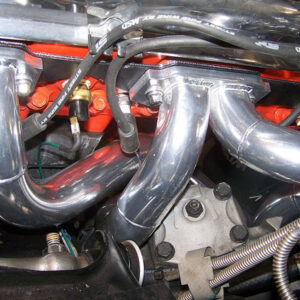
This header can be built in any tube size UP TO a 2 ¼” stepped to 2 3/8” primary with UP TO 4 ½” collectors. All of the tubes are inside the frame. Our headers are hand made to order so we can build them for any engine deck height and for any aftermarket cylinder head as long as the engine is in the correct position. On our design car we used Earl Williams Classics (909-392-1358) new style side engine mounts and transmission cross member (see photo’s). These motor mounts position the engine ¾” forward from the stock position for firewall clearance and centered the engine in the frame. If your engine is forward or back from this position we can compensate for that up to about ¾ but” the engine must be centered. With a BB in these cars the steering box is the big issue.
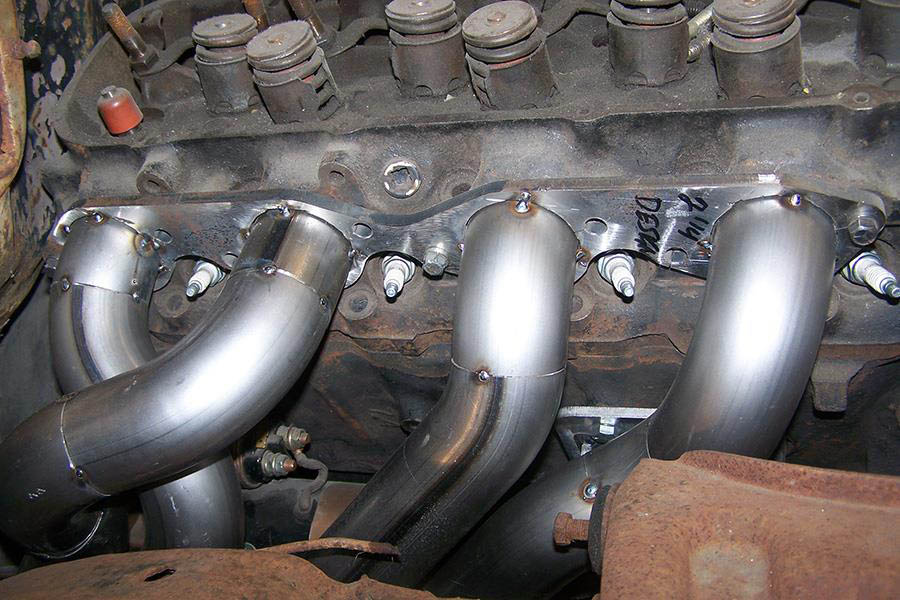
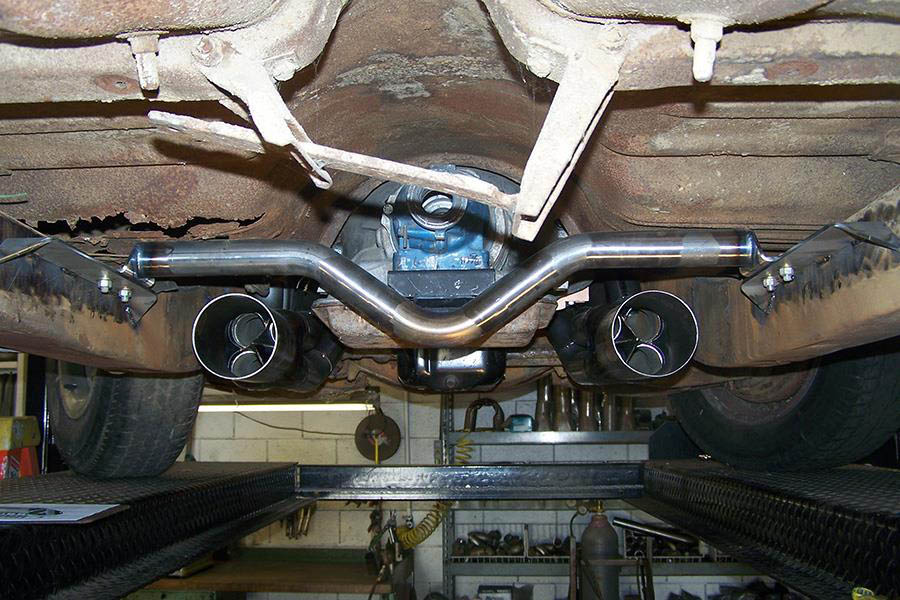
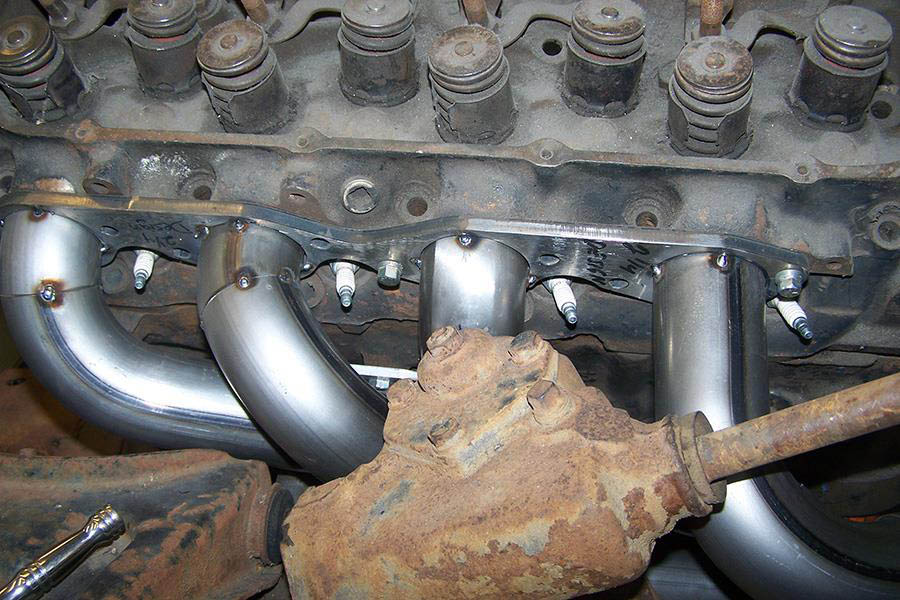
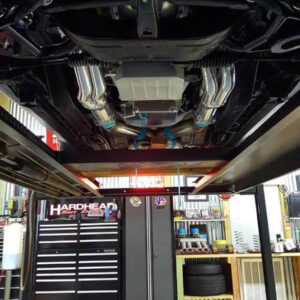
Ground clearance is excellent and spark plug access is very good. We used a Milodon
7 quart oil pan #30970. Measuring from the side of a stock oil pan on the passenger side we have 2 ¾” at mid pan and 4 ¼” of room at the bottom of the pan for side sump kick outs. On the driver side we have 2” at mid pan to 4 ½” of room at the bottom of the pan. If you have an oil pan with a sump kick out that is under the filter, the filter will be trapped. With a straight sided pan the filter is easily removed.
What Fits:
This header requires aftermarket side motor mounts, it does not fit the original bell housing side mounts or column shifter linkage, clutch linkage or a midplate.
Milodon #30970 and #30975 oil pans will fit this header, but they both have kick out sumps, so they trap the oil filter. Milodon #31100 & #31105 oil pans fit this header and they do not have sump kick outs, so oil filter access is very easy.
This header requires a mini starter. We designed it with a Tilton Super Duty starter.
A full sized GM starter will not fit.
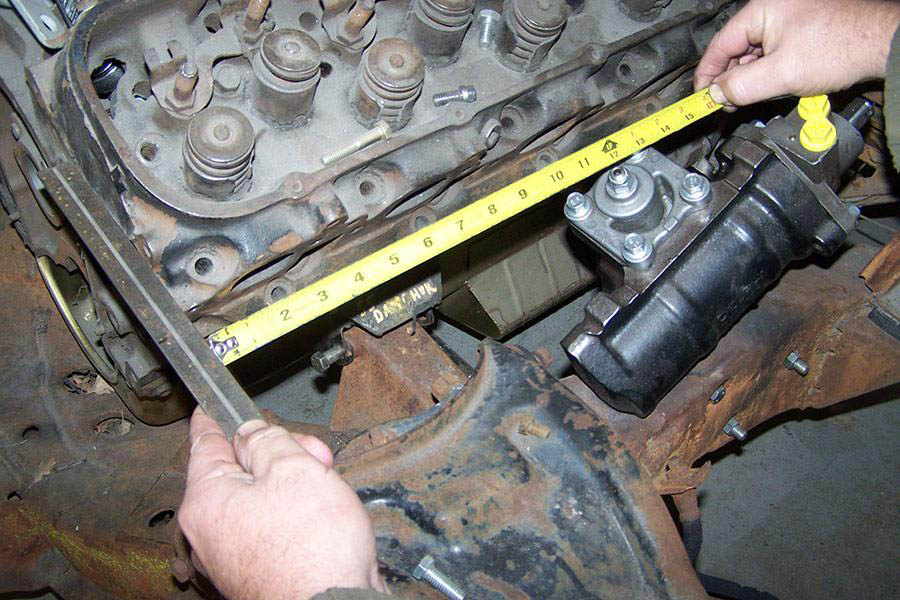
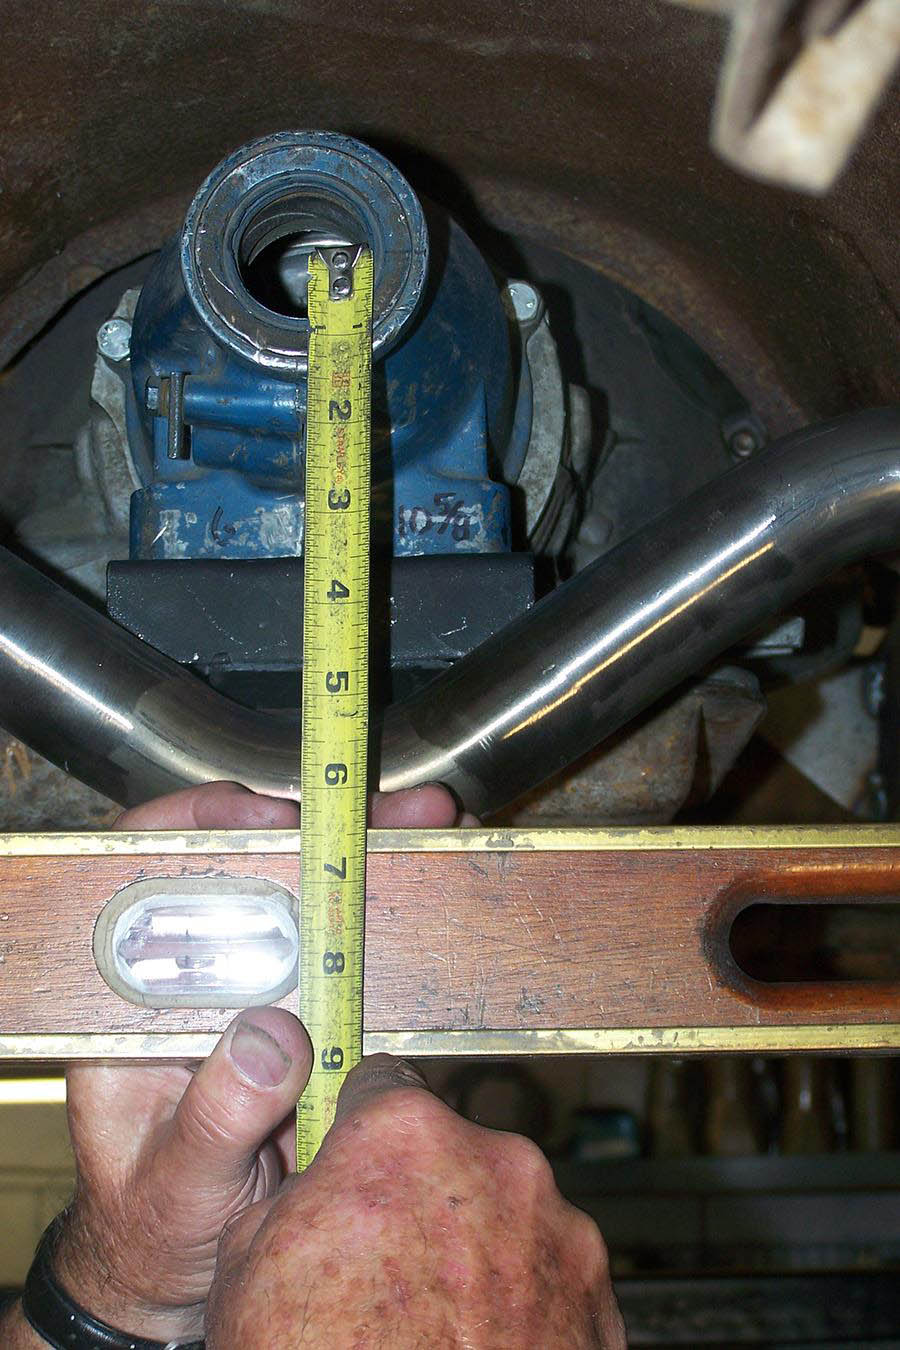
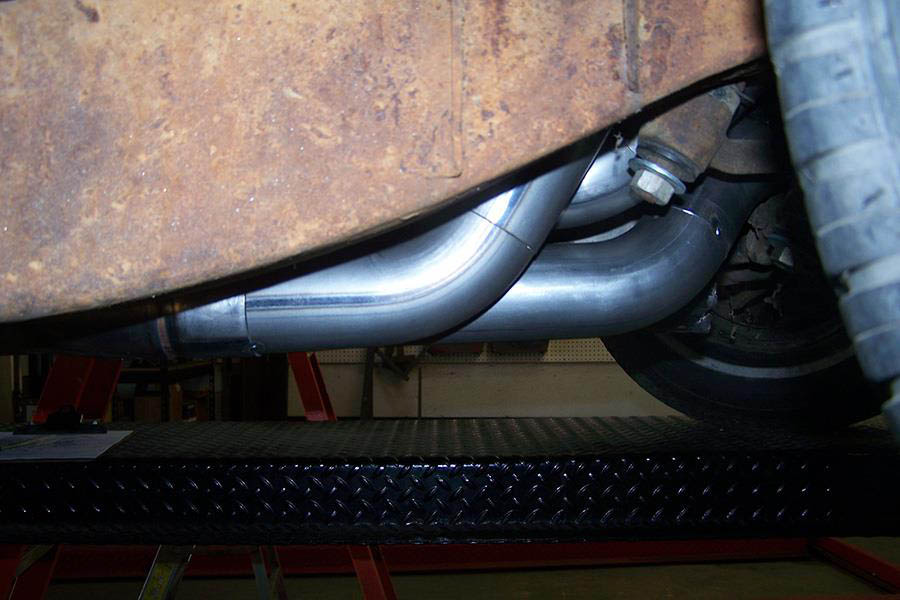
The steering box is difficult to clear. If you have a tall deck block plus raised port heads that exceeds .600” we will not be able to clear it. (See photo) You will have to dent the tube or grind some on the steering box.
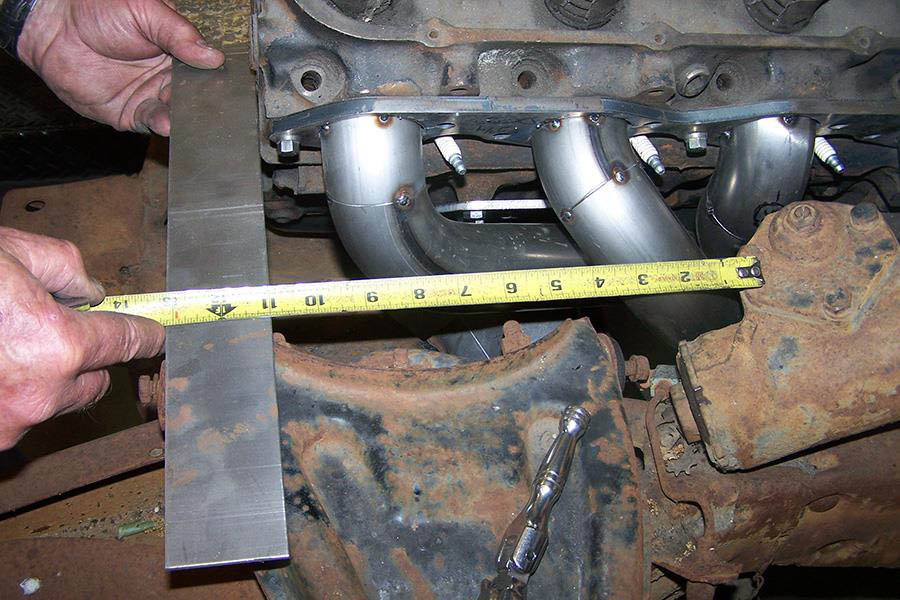
We depend on the customer for good information and to take some measurements for us. (See photos)
Installation: for the Pro-Tour Style
Before installing the headers read our installation tips page.
If the header is built as a pro-tour header, all on piece, then it should be installed as the engine is being installed.
663-#2
Note:
Be sure to read our Yellow “Header Installation Tips” page before installing the headers.
It will make installing them much easier and save you time.
Installation: for the Race Style
If the header is built as a race header, with individual tubes and slip on race collectors, it can be installed with the engine in place.
Driver side, hold #1 tube in place until you get #3 tube into position, then bolt both tubes to the head. Install #5 tube from bottom, install #7 tube from bottom, all header bolts should only be snug, not tight. One of the collectors will have an “L” stamped on one of the mounting tabs. Install the driver side collector with that “L” facing down. The “L” tab on the collector has to match up with the “L” tab on the lower outside primary tube. Once collector is installed then tighten all bolts.
Passenger side, with the starter in place install #2 tube from bottom, install front bolt only and leave the tube very loose. Install #4 from bottom, then #8 from bottom, then #6 from top. Snug all header bolts then install “R” collector and tighten all bolts.
Installation: for the Pro-Tour Style
Driver side, should be installed as the engine is being installed.
Passenger side, remove the starter, then 9install the header from the bottom.
If you have a kick out oil pan you may have to raise the engine slightly.
We offer the Power Master #9540 starters.
Thank you for selecting Lemons Headers.
If you have any questions, give us a call at 805-239-8998
Additional information
| Metal |
|---|
Related products
-
#SBPT-202 – ‘67-’69 CAMARO SMALL BLOCK – ‘68-’74 NOVA SMALL BLOCK – SB Pro Tour header for Detroit Speed & Engineering chassis, Also for Chris Alston’s Chassisworks, Heidt’s, Martz, Smith Racecraft, and Checkered Racing front clips, also stock chassis with rack & pinion.
$2,250.00 – $4,500.00 Learn More This product has multiple variants. The options may be chosen on the product page -
#SBPT-200 – ‘67-’69 CAMARO SMALL BLOCK – ‘68-’74 NOVA SMALL BLOCK – SB Pro Tour header for stock chassis with stock steering box. #SBPT-200A version can be made for factory AC.
$2,250.00 – $4,500.00 Learn More This product has multiple variants. The options may be chosen on the product page -
#BBPT-661 – ‘67-’69 CAMARO BIG BLOCK – ‘70-’81 CAMARO BIG BLOCK – ‘68-’74 NOVA BIG BLOCK – ‘75-’79 NOVA BIG BLOCK – ‘55-’57 CHEVY BIG BLOCK – BB Pro Tour header for stock chassis with rack & pinion steering. Also for Chris Alston’s Chassisworks, Martz, Checkered Racing, Jim Meyers, Fatman & TCI front clips.
$2,250.00 – $4,500.00 Learn More This product has multiple variants. The options may be chosen on the product page -
#BBPT-660 – ‘67-’69 CAMARO BIG BLOCK – ‘68-’74 NOVA BIG BLOCK – BB Pro Tour header for Detroit Speed & Engineering chassis
$2,250.00 – $4,500.00 Learn More This product has multiple variants. The options may be chosen on the product page